


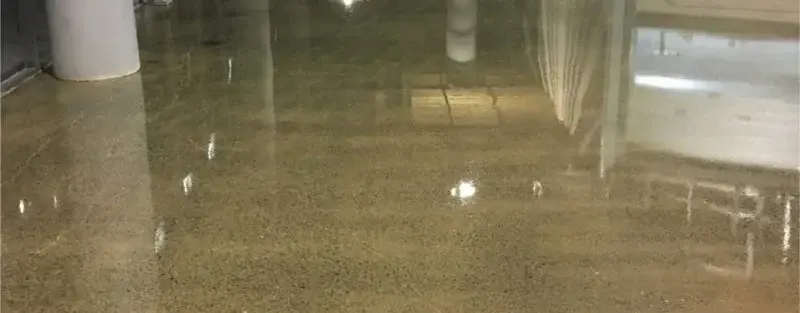
A garage floor takes a beating. Between leaking fluids, dusty footprints, hot tires, and dropped tools, the average concrete surface doesn’t stand a chance over the years. But you don’t have to resign yourself to dull, stained slabs. Enter epoxy coating—a transformative solution that seals, protects, and beautifies your garage in one sleek stroke.
Whether you’re a weekend warrior, a home mechanic, or simply someone who wants a cleaner, more polished space, epoxy coating offers the perfect blend of practicality and style. But before you rush to the nearest hardware store or book a contractor, it’s important to understand what makes epoxy garage floors last—and look stunning while doing it.
Surface Preparation: The Silent Workhorse of Epoxy Success
The foundation of any great epoxy concrete floor isn’t the resin—it’s the prep. Think of it like painting a wall; if it’s dusty, cracked, or grimy, no amount of premium paint will make it stick. The same principle applies here.
Key Preparation Steps:
- Degreasing: Garage floors are notorious for oil and grease. Use a commercial-grade degreaser to fully strip these contaminants.
- Etching or Grinding: For epoxy to adhere, your surface must have a slight texture. Acid etching or mechanical grinding roughens the surface, ensuring optimal bonding.
- Moisture Test: Epoxy despises moisture. Tape down a plastic sheet for 24 hours. If water forms underneath, your floor may need a vapor barrier or won’t be suitable for coating.
- Crack & Pit Repair: Fill cracks with an epoxy-compatible patching compound. Skipping this step may cause uneven application or eventual failure.
Take your time with prep—it accounts for nearly 70% of the success in an epoxy garage installation. A poorly prepared floor is like building a house on sand.
Choosing the Right Epoxy Coating for Your Garage
The world of epoxy coatings is not one-size-fits-all. Each type offers unique benefits, and choosing the right one depends on your budget, garage usage, and desired finish.
Three Main Types of Epoxy Coating:
- Water-Based Epoxy
- Easy to use and emits fewer fumes.
- Ideal for light-duty residential garages.
- Budget-friendly, but less durable over time.
- Easy to use and emits fewer fumes.
- Solvent-Based Epoxy
- Offers stronger adhesion and resistance.
- Emits stronger odors and requires excellent ventilation.
- Slightly more expensive but delivers professional-grade results.
- Offers stronger adhesion and resistance.
- 100% Solids Epoxy
- The gold standard of concrete floor epoxy.
- Cures to a thick, hard finish that resists chemicals, scratches, and heat.
- Has a very short working time, so it’s best applied by professionals.
- The gold standard of concrete floor epoxy.
If you’re planning to use your garage as a workshop or store heavy equipment, 100% solids epoxy is your best bet. For a cosmetic upgrade or occasional use, a water-based product may suffice.
Application Tips for a Flawless Finish
Once the prep is complete and your product is chosen, it’s time to apply the epoxy. But don’t rush—timing, technique, and environmental conditions all play a role in the final outcome.
Expert Tips:
- Mix Precisely: Epoxy consists of two parts—resin and hardener. Mix in exact proportions, and only prepare what you can apply within the working window (typically 20–40 minutes).
- Start Early: Temperature matters. Ideally, apply epoxy in the early morning when humidity is low and temps are moderate.
- Apply in Zones: Work in 4×4 foot sections. This allows for even distribution and prevents roller marks.
- Add Texture: For traction, sprinkle decorative chips or anti-slip additives while the coating is still wet.
- Don’t Skip the Topcoat: A clear polyurethane or polyaspartic top layer adds depth, shine, and UV protection. It also extends the lifespan of your epoxy garage floor dramatically.
One misstep—such as overmixing, under-prepping, or skipping edges—can compromise the entire project. Attention to detail pays dividends here.
Resin Flooring vs. Concrete Floor Epoxy
You may hear the terms resin flooring and epoxy used interchangeably, but there are distinctions worth understanding.
Resin Flooring:
This is a broad term encompassing a variety of synthetic coatings—polyurethane, acrylic, MMA (methyl methacrylate), and of course, epoxy. Each has unique properties.
Epoxy Coating:
Epoxy is a type of resin, but what sets it apart is its unmatched hardness and adhesion. It’s also:
- Highly chemical- and heat-resistant
- UV-sensitive unless protected with a topcoat
- Ideal for garages, warehouses, and commercial floors
Polyurethane resins tend to be more flexible and scratch-resistant, making them great for interior living areas or factory floors. But when it comes to withstanding garage-level abuse, epoxy concrete floor coatings still reign supreme.
What’s the Real Cost to Epoxy Garage Floor?
Ah yes, the money question. The cost to epoxy garage floor installations depends on a variety of factors—size, condition, materials, and whether you’re rolling up your sleeves or hiring out the job.
DIY Route:
- Material Cost: $100–$300 for a 2-car garage
- Tools Needed: Rollers, mixing paddles, surface prep gear ($75–$150)
- Time: 2–3 days minimum, including curing
Pros: Cost-effective.
Cons: Labor-intensive. High risk of error.
Professional Installation:
- Basic Epoxy: $4–$7 per sq. ft.
- Premium or Decorative Finishes: $8–$12 per sq. ft.
- Add-Ons: Crack repairs, topcoats, and flakes can increase total cost
A professionally installed epoxy garage floor may seem costly upfront, but the finish, durability, and warranty often outweigh the DIY gamble.
Importance of the Article
Why does all this matter? Because every year, thousands of homeowners attempt to install epoxy flooring without understanding what makes it work—or fail. Missteps like skipping surface prep or choosing the wrong product can result in peeling, yellowing, or even full reinstallation.
This guide exists to bridge that gap. Knowledge ensures success. By understanding the intricacies of epoxy coating, homeowners can make confident decisions, avoid pitfalls, and enjoy a garage floor that’s as reliable as it is beautiful.
Conclusion
Gone are the days of dusty, cracked concrete and endless sweeping. With the right epoxy concrete floor system, your garage can become a sanctuary—clean, resilient, and easy to maintain.
Epoxy flooring doesn’t just coat—it protects, enhances, and revitalizes. Whether you’re a DIY novice or working with seasoned pros, the principles remain the same: prep well, choose wisely, apply carefully, and finish strong.
When done right, an epoxy garage floor becomes more than a surface—it becomes a reflection of pride and purpose.
5 Frequently Asked Questions
1. Can I apply epoxy in cold weather?
Epoxy needs mild conditions to cure properly—ideally 55°F to 85°F. In colder climates, use formulations designed for low temperatures.
2. How long before I can drive on it?
Light foot traffic is safe after 24 hours. For vehicles, wait at least 72 hours. Full chemical cure can take up to 7 days.
3. Will epoxy hide cracks or imperfections?
It will not mask structural issues. Surface prep and crack repair must be completed before application for the best results.
4. Is epoxy resistant to road salt and chemicals?
Yes. Properly cured epoxy resists oil, gasoline, salt, and most household chemicals. A topcoat adds even more protection.
5. Can epoxy floors be refreshed or recoated?
Absolutely. If the finish dulls over time, light sanding followed by a new topcoat can restore shine and performance.
Call to Action
If you’re ready to elevate your garage with a stunning, long-lasting epoxy coating, trust the professionals at Epoxy Flooring Panama City. From custom finishes to expert installations, we help homeowners turn drab concrete into dependable, beautiful flooring that lasts.Schedule your free consultation today—your garage deserves it.