


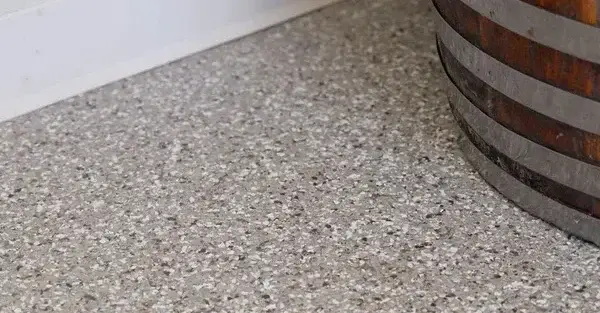
The garage is no longer just a place to park the car or stash forgotten tools. For many, it’s an extension of the home—a workspace, a hobby area, or even a place to unwind. And nothing transforms this often-overlooked space like a fresh, sleek epoxy floor.
But professional installation? It can get pricey. That’s why more and more homeowners are turning to the epoxy garage floor kit—a budget-friendly solution that offers durability, visual appeal, and long-term value. With the right kit and a weekend of work, your garage can go from grimy to gleaming without breaking the bank.
And yes—you can do it yourself, save big, and still end up with a floor that looks like a pro did it.
Choosing the Right Garage Floor Epoxy Kit
Not all garage floor epoxy kits are created equal. The difference between a long-lasting finish and a peeling disaster often lies in the quality of the materials and how well they’re applied.
What to Look for in a Kit:
- Two-part epoxy system: These combine resin and hardener for a chemical reaction that cures into a rock-solid finish. Avoid “one-part” paints labeled as epoxy—they don’t hold up.
- Coverage area: Know your square footage. A kit designed for 250 sq. ft. won’t cut it for a two-car garage.
- Included tools and extras: Some kits come with rollers, decorative chips, anti-slip additives, and even etching solution.
- Cure time: Some products cure faster than others. Fast-curing formulas are convenient, but they require quicker work.
- UV resistance: If your garage sees a lot of sunlight, look for a kit with UV-stable topcoat to prevent yellowing over time.
A high-quality epoxy kit for garage floor surfaces isn’t just about making the floor look pretty—it’s about making sure it lasts.
Best Budget-Friendly Garage Floor Epoxy Kits
If you’re planning to DIY, choosing a reliable and cost-effective diy garage floor epoxy kit can save hundreds—sometimes thousands—compared to professional installation.
Here are some categories to consider:
1. Basic Epoxy Kits
- Price range: $100–$200
- What you get: Two-part epoxy, minimal extras
- Best for: Smaller garages, workshops, utility spaces
- Lifespan: 2–4 years with moderate wear
These are great entry-level kits that provide a noticeable upgrade without a big financial commitment.
2. Mid-Tier Epoxy Kits
- Price range: $200–$400
- What you get: Resin, hardener, decorative flakes, anti-slip grit, etching cleaner, topcoat
- Best for: One- or two-car garages
- Lifespan: 5–10 years depending on usage and prep
These kits strike a solid balance between affordability and performance. They typically come with a satin or gloss finish and enough material to coat a standard-sized garage.
3. Premium Garage Epoxy Floor Kits
- Price range: $400–$800+
- What you get: High solids content epoxy, professional-grade components, UV-stable topcoat, metallic pigments or custom flake blends
- Best for: Long-term performance, decorative finishes, garages that double as workspaces or showrooms
- Lifespan: 10–20 years with proper application
While these kits cost more, they often deliver a return on investment through longevity, appearance, and minimal maintenance.
How to Maximize Value From Your Epoxy Garage Floor Kit
The secret to saving big isn’t just about buying a cheaper garage epoxy floor kit—it’s about getting the most out of every dollar spent. Here’s how:
1. Prep Thoroughly
No matter how expensive or well-reviewed your garage floor epoxy kit is, it won’t stick to a dirty or damp floor. Clean the surface completely, degrease, fill cracks, and either acid-etch or grind the concrete to ensure strong adhesion.
2. Measure Twice, Mix Once
Epoxy has a limited pot life (often 30–45 minutes after mixing). Measure your space, divide it into sections, and work methodically. Don’t mix more than you can apply in that window.
3. Use Every Component
Many kits include flakes, anti-slip additives, and topcoats. Don’t skip these—each one enhances safety, durability, and appearance.
4. Time It Right
Choose a mild, dry weekend. Avoid extremely hot or humid days, as these conditions can affect curing time and finish quality.
Importance of the Article
Thousands of homeowners dream of upgrading their garage floors but stop short due to cost. Professional installations can be beautiful—but they’re not the only option. This article shines a spotlight on epoxy garage floor kits as a smart, budget-conscious alternative that doesn’t sacrifice quality.
By understanding how to choose the right kit and apply it correctly, homeowners can confidently take on a DIY project that delivers serious impact—without the financial strain. It’s about empowerment, savings, and elevating the everyday space beneath your feet.
Conclusion
You don’t need to drain your bank account to have a stunning, durable, and easy-to-clean garage floor. With the right diy garage floor epoxy kit, you can achieve professional-looking results at a fraction of the cost.
From choosing a high-quality product to prepping your surface and applying each layer with care, the process is accessible—and rewarding. The transformation is not just visual; it’s functional. It’s about turning a basic slab of concrete into something resilient, attractive, and reflective of your home’s value.
In short: epoxy your garage, keep your budget intact, and enjoy a floor that truly performs.
5 Frequently Asked Questions
1. How long does a DIY epoxy floor from a kit last?
With good prep and proper application, a quality kit can last anywhere from 5 to 10 years—or longer with minimal wear.
2. Do epoxy kits include everything I need?
Most include the resin, hardener, and optional flakes. Some offer etching cleaner and rollers. You may need to buy cleaning supplies or extra tools separately.
3. Can I apply epoxy in humid weather?
High humidity can affect curing and adhesion. It’s best to apply epoxy in mild, dry conditions—ideally between 60°F and 80°F.
4. How many square feet does one kit cover?
Coverage varies, but most kits range between 200–500 sq. ft. Check the product label to make sure it fits your garage’s size.
5. Is one coat enough for my garage floor?
Basic kits may work with one coat, but applying a second coat or a clear topcoat enhances durability and finish.
Call to Action
Want to transform your garage floor without the stress or the price tag of a professional install? Epoxy Flooring Panama City offers expert guidance, premium product recommendations, and the knowledge you need to get started.
Find the perfect garage floor epoxy kit for your space and start saving big—without cutting corners.