


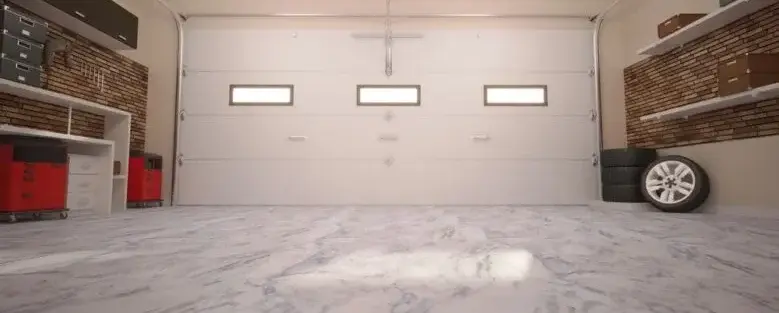
Your garage floor deserves better than cracks, stains, and that dusty gray concrete look. Whether you’re turning your garage into a workspace, gym, or just want a cleaner, more polished space, epoxy is a game-changer. It transforms tired concrete into a smooth, glossy, and durable surface that can stand up to cars, tools, and foot traffic.
But let’s be real: the thought of doing it yourself might feel intimidating. Between the prep, mixing, and application process, a DIY epoxy garage floor can seem like a major project. And while it does take planning, with the right approach and tools, it’s entirely doable—even for first-timers.
So if you’ve been asking yourself how to get a professional-looking finish without hiring a pro, this guide will walk you through every step of how to epoxy garage floor surfaces without the hassle.
The Stress-Free Guide to a Flawless DIY Epoxy Garage Floor
Step 1: Know What You’re Working With
Every good project starts with evaluating the canvas. For garage floors, this means checking the condition of the concrete:
- Is it stained with oil or grease?
- Are there cracks or uneven patches?
- Is the surface painted or sealed?
Before applying diy garage floor epoxy, the surface must be completely clean, dry, and free from coatings. Any contaminants will prevent proper adhesion and lead to peeling later on.
Use a degreaser and stiff brush for tough stains. If the floor has old paint or sealant, mechanical grinding may be necessary. Don’t skip this—it’s the foundation for success.
Step 2: Choose the Right DIY Garage Floor Epoxy Kit
There are dozens of kits out there, so don’t just grab the first one on the shelf. Look for:
- Two-part kits (resin + hardener) for durability
- Included tools (rollers, anti-slip additives, mixing stick)
- Square footage coverage—ensure it matches your space
- Cure time—some epoxies require more downtime than others
A high-quality diy epoxy garage floor kit might cost more upfront, but it will save frustration and give better results long-term.
Step 3: Prep Like a Pro
Even the best epoxy won’t bond to dirty or damp surfaces. Here’s a streamlined process to prep right:
- Sweep and vacuum thoroughly
- Degrease and rinse
- Etch the surface with acid (or grind it with a floor grinder)
- Fill cracks with concrete filler
- Dry the floor completely—no shortcuts
Want to test if your floor is ready? Sprinkle water on the surface. If it beads, it’s not ready yet. If it soaks in, you’re good to go.
Step 4: Mix, Roll, and Repeat
This is the exciting part. Most epoxy garage floor DIY kits have a short working time once mixed (often 20–40 minutes), so be prepared to work in sections.
- Mix thoroughly: Scrape the edges and bottom of the bucket to ensure even blending
- Apply in zones: Start at the far corner and work your way out
- Use a roller: A long-handled roller makes application easier and more even
- Add texture: Broadcast decorative chips or non-slip additives while the surface is still wet
Let it cure based on the instructions. Typically, light foot traffic is okay after 24 hours, but wait 3–5 days before parking a vehicle.
The Real Advantages of a Do It Yourself Epoxy Garage Floor
A professionally installed epoxy floor looks great—but so can your own, especially if you follow best practices. Here’s why going the DIY route might be your best move:
Cost Savings
Professional installs can run $3,000 or more. A diy epoxy garage floor kit ranges from $100–$400. Even adding tools and prep supplies, you’re still saving significantly.
Personal Satisfaction
There’s a real sense of pride in looking at your garage and thinking, I did that. Plus, DIY projects let you customize colors, textures, and even designs.
Low Maintenance
Once cured, your new epoxy floor resists oil stains, cracks, and moisture. Cleanup is a breeze. Dirt and spills sit on the surface instead of sinking in.
Importance of the Article
Many homeowners hesitate when considering a do it yourself epoxy garage floor, worried they’ll mess it up or it won’t look as good as a pro job. But this guide is proof that—with preparation and patience—it’s entirely achievable. This article breaks down the process into clear, manageable steps so anyone can transform their garage without stress.
Investing time in your own space has long-term rewards. And whether your motivation is saving money, upgrading your home, or taking on a weekend project, DIY garage floor epoxy is a project that pays off—visually and functionally.
Conclusion
Taking on a DIY epoxy garage floor might sound like a major commitment, but it doesn’t have to be overwhelming. With the right diy garage floor epoxy kit, a weekend of prep, and a little patience, you can create a floor that looks polished, protects your concrete, and adds value to your home.
You don’t need to be a contractor. You just need the right steps, a few basic tools, and a vision for something better than cracked, dusty concrete.
Breathe new life into your garage—on your own terms.
5 Frequently Asked Questions
1. How long does a DIY epoxy garage floor last?
With proper prep and application, it can last 3–5 years or longer. Using higher-quality kits and adding a topcoat can extend the lifespan.
2. Can I apply epoxy over old paint or sealant?
No. The epoxy won’t adhere properly. You’ll need to remove any previous coatings through grinding or etching.
3. Are DIY epoxy garage floor kits safe to use indoors?
Most modern kits are low-VOC and safe when used with proper ventilation. Always check the label and wear protective gear.
4. How many coats do I need?
Most kits include a base coat and an optional clear topcoat. A single coat may work, but two coats improve durability and appearance.
5. Will my tires damage the epoxy floor?
Not if the floor is prepped and cured correctly. Hot tire pickup is usually caused by poor bonding due to inadequate surface prep.
Call to Action
Ready to upgrade your garage without the stress or high costs? A DIY epoxy garage floor kit is the perfect place to start. For high-quality materials, professional tips, and product recommendations, visit Epoxy Flooring Panama City.
Make your garage floor a source of pride, not frustration. Let’s get rolling.